How to Renovate an Old Apartment: A Practical Step-by-Step Guide
Renovating an old apartment is an opportunity to improve comfort, update outdated interiors and make better use of the available space. But before choosing new flooring, wardrobes or paint colours, it is important to check the condition of the plumbing, electrical wiring, bathrooms, windows and other existing components.
This guide explains how to plan an old apartment renovation, set priorities, manage the budget, select materials and organise the work from the initial inspection to the final handover.
Why Renovate an Old Apartment?
An older flat may have a convenient location and a layout that still works well for its occupants, but its finishes, fittings and services may need attention. A renovation can improve functionality without requiring a complete change to the apartment’s existing structure.
Depending on its condition, a renovation might involve repainting and replacing lights, upgrading the kitchen and bathrooms, improving storage, replacing flooring or carrying out a more extensive refurbishment.
Improve everyday comfort
Update lighting, ventilation, furniture layouts and storage to make the apartment more practical.
Address hidden problems
Investigate leaks, dampness, damaged finishes and outdated services before installing new interiors.
Modernise the appearance
Refresh colours, flooring, doors, kitchen cabinets and other finishes with a coordinated design.
Make better use of space
Introduce practical wardrobes, multifunctional furniture and storage suited to the household.
Step 1: Inspect the Apartment Before Starting Work
Begin with a room-by-room inspection and record the problems that need attention. An apartment can look worn because of old paint and furniture, but some of the most expensive problems may be hidden behind tiles, cabinets or plaster.
Check the following areas
- Walls and ceilings: Look for cracks, damp patches, peeling paint, mould and signs of water ingress.
- Flooring: Check loose tiles, hollow areas, uneven surfaces, damaged skirting and changes in floor level.
- Electrical system: Have wiring, sockets, earthing, circuit protection and the distribution board checked by a qualified electrician.
- Plumbing: Inspect taps, visible pipes, drainage, water pressure, concealed leaks and the condition of bathroom fittings.
- Bathrooms: Check seepage, loose tiles, drainage, ventilation and the condition of the waterproofing where it can be assessed.
- Kitchen: Review cabinet condition, countertop damage, sink connections, ventilation and appliance requirements.
- Windows and doors: Look for damaged frames, water entry, difficult operation, worn seals and poor locking.
- Woodwork: Inspect wardrobes and door frames for swelling, termite activity and damage caused by moisture.
Step-by-Step Process for Renovating an Old Apartment
Step 1: Define the renovation scope
Decide which rooms and systems need work. Separate essential repairs from upgrades that can wait. Record what will be retained, repaired, replaced or newly installed.
For example, retaining a sound wardrobe may free up budget for electrical improvements or bathroom waterproofing. Conversely, damaged cabinets may need replacement if they have been affected by leaks or pests.
Step 2: Set a realistic budget
Prepare an initial budget that covers materials, labour, demolition, disposal, transport, installation and finishing. Include any necessary plumbing, electrical, civil or waterproofing work.
Keep a contingency reserve for hidden defects and changes discovered after demolition. The appropriate reserve depends on the age and condition of the apartment, the scope of work and how much can be inspected before construction.
Step 3: Check permissions and building rules
Before work starts, check the apartment association or society’s requirements for renovation hours, debris removal, lift protection, water shutoffs and contractor access.
Structural changes, changes to shared services, external windows or facade elements, and work affecting common areas may require specific approvals. Do not remove structural walls, columns or beams without appropriate professional assessment and approval.
Step 4: Finalise the layout and materials
Prepare measured drawings showing furniture, kitchen cabinets, wardrobes, electrical points, lighting and plumbing requirements. Select flooring, wall finishes, cabinet materials, handles and fittings before ordering custom items.
Planning these details in advance reduces last-minute changes and helps contractors prepare more accurate quotations.
Step 5: Carry out demolition and concealed work
Remove only the elements included in the approved scope. After opening the affected areas, inspect the exposed plumbing, wiring, substrates and surfaces before closing them again.
Complete necessary repairs, electrical and plumbing rough-ins, and waterproofing before new tiles, cabinets or finishes conceal the work.
Step 6: Complete civil work and flooring
Repair plaster, correct relevant surface defects and complete required waterproofing and tiling in the appropriate sequence. Allow products to cure according to their manufacturer’s instructions.
Confirm floor levels, thresholds and transitions between rooms before installation is considered complete.
Step 7: Install kitchen, wardrobes and other carpentry
Once the relevant surfaces are ready, install the planned cabinets, wardrobes, storage units, doors and other woodwork. Confirm dimensions and service points before fixing custom furniture.
Protect finished flooring and check that drawers, shutters and doors open properly without obstruction.
Step 8: Finish painting and install fixtures
Complete surface preparation, primer and paint according to the selected system. Install final light fixtures, switches, sanitary fittings, appliances and accessories once the relevant work areas are ready.
Touch up damaged surfaces and clean the apartment after construction and installation work is complete.
Step 9: Inspect and hand over
Test lights, sockets, water supply, drainage, doors, windows, cabinet hardware and appliances. Review visible finishes and record any outstanding work in a snag list.
Collect warranties, product details, relevant drawings and instructions for maintaining the installed materials.
Important Repairs in an Old Apartment
1. Electrical wiring and safety
Older electrical installations may not be suited to current appliance loads or household requirements. Have a qualified electrician assess the wiring, earthing, distribution board, circuit protection and the locations of sockets and switches.
If replacement or additional circuits are required, plan them before plastering, tiling or closing a false ceiling. The scope should be based on the actual condition of the installation, not simply the age of the apartment.
2. Plumbing and drainage
Inspect visible pipes, water pressure, joints, taps, traps and drainage. If concealed plumbing is suspected to be damaged or corroded, have it assessed before covering the affected walls or floors.
Plan connections for the kitchen sink, washing machine, dishwasher, geyser and other appliances before cabinet fabrication and tiling are finalised.
3. Bathroom and balcony waterproofing
Recurring dampness or leakage may originate from plumbing, failed waterproofing, exterior walls, balcony joints or other building elements. Determine the cause before choosing a repair method.
When a bathroom is being extensively renovated, assess the substrate and waterproofing system and follow the specified installation, curing and testing requirements before laying new tiles. Coordinate work that could affect neighbouring flats or shared building areas with the relevant professionals and association.
4. Structural cracks and damaged concrete
Not every crack indicates a structural problem, but widening cracks, significant movement, exposed reinforcement or damaged concrete require professional assessment. Avoid concealing suspicious damage with putty or paint before the cause is understood.
Structural changes should be designed and supervised by appropriately qualified professionals, with required approvals obtained before work begins.
5. Windows, doors and ventilation
Repair or replace windows and doors where their condition affects safety, operation, noise control or resistance to water entry. Check seals, frame joints, locks and drainage paths.
Make sure any proposed replacement complies with the building’s requirements, particularly for external appearance and shared facade elements.
Room-by-Room Old Apartment Renovation Ideas
Living room renovation
Improve the living room by planning furniture around the available circulation space. A refreshed wall colour, coordinated lighting, a practical TV unit and well-sized seating can update the appearance without unnecessary construction.
- Choose a furniture layout that preserves clear walking routes.
- Use storage that suits the room instead of filling every wall.
- Update lighting and switches to suit the way the room is used.
- Coordinate paint, flooring, curtains and furniture finishes.
Bedroom renovation
Prioritise comfortable circulation, wardrobe access and useful bedside lighting. Replace damaged wardrobes or hardware, and consider internal storage improvements before deciding whether an entire cabinet needs replacement.
- Check wardrobe dimensions and door movement.
- Plan power points for charging and everyday appliances.
- Choose suitable wall colours and practical lighting.
- Inspect existing flooring and skirting before adding new finishes.
Kitchen renovation
A kitchen renovation should address function before appearance. Review the working layout, countertop, storage, ventilation, sink connections and appliance requirements.
- Plan cabinet storage around actual utensils and groceries.
- Check plumbing and electrical points before ordering cabinets.
- Choose cabinet materials appropriate for the installation conditions.
- Provide access to essential connections and service points.
Read our guide to what is included in turnkey interior design to understand how different work items may be coordinated in a project.
Bathroom renovation
Prioritise leak detection, waterproofing, drainage, ventilation and safe electrical arrangements. Once these are addressed, update tiles, fittings, storage and lighting according to the available space.
- Inspect the existing plumbing and drainage before demolition is completed.
- Confirm the waterproofing scope and required testing.
- Choose suitable non-slip flooring for the intended wet areas.
- Provide accessible storage without obstructing movement.
Entrance and storage
A small entrance can feel more organised with a suitable shoe cabinet, wall hooks and a dedicated place for keys and bags. In bedrooms, use efficient wardrobe layouts and consider under-bed storage where it is practical.
Explore our guide on how to maximise storage in a small flat for more space-saving ideas.
Old Apartment Renovation Inspiration Gallery
Use these residential interior images as general inspiration for updating an apartment’s finishes and layout. For the strongest relevance, replace generic images with actual before-and-after renovation photographs or completed project images.
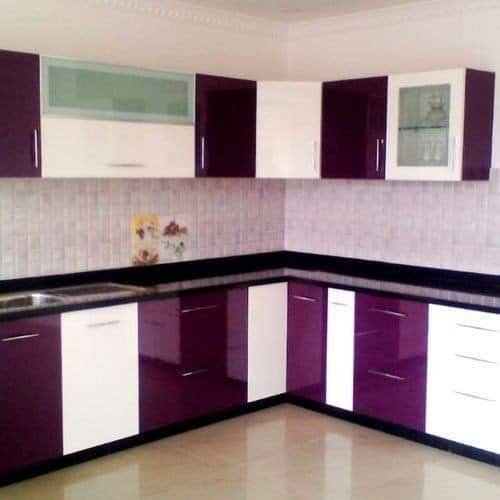
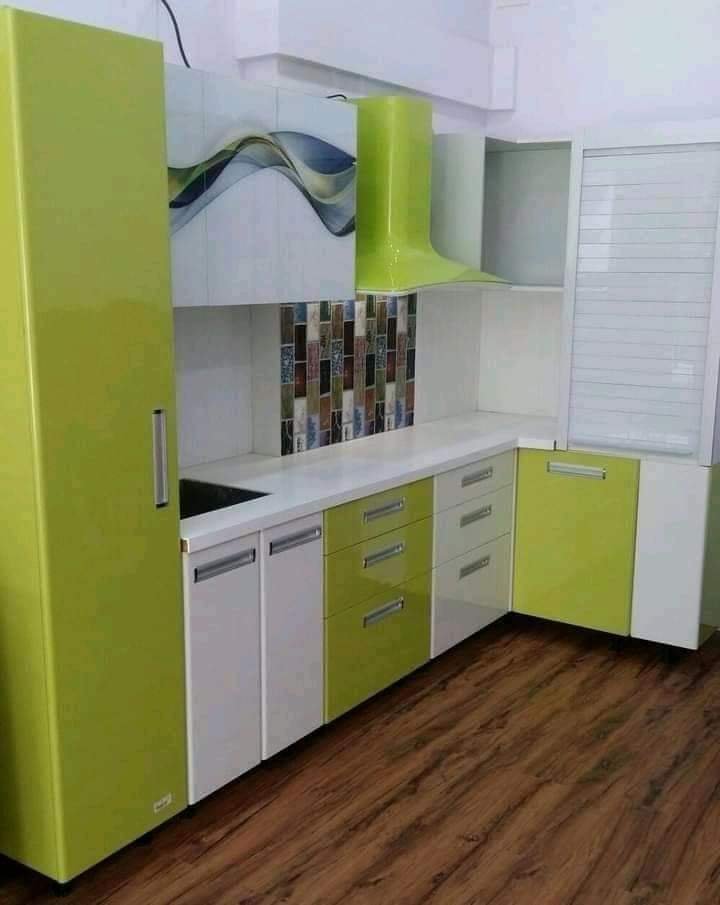


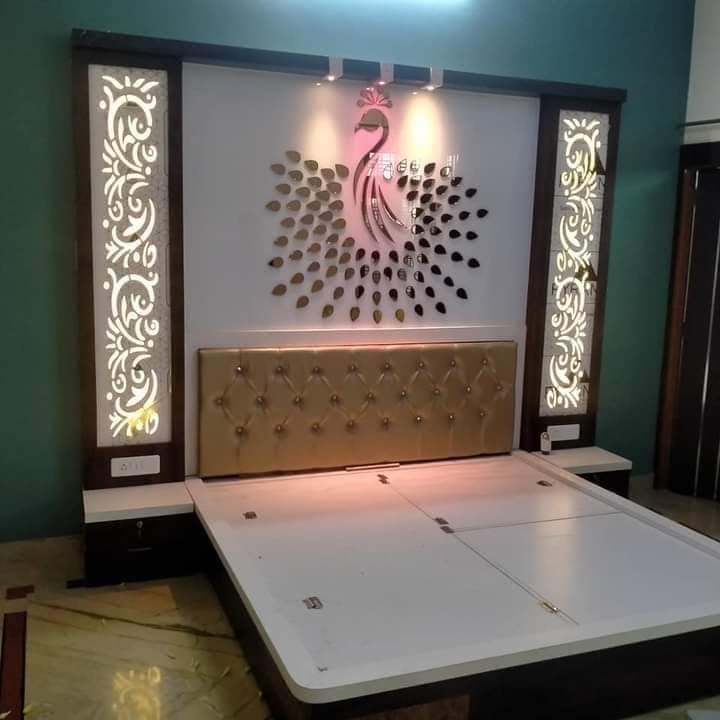
Verify that each image loads and accurately matches its caption and alt text. Use original renovation photos whenever possible to show the actual quality and scope of completed work.
How to Budget for an Old Apartment Renovation
Renovation costs depend on the apartment’s size and condition, the extent of demolition, the materials selected, labour rates, the number of bathrooms and the amount of electrical, plumbing and civil work required.
A cosmetic refresh is very different from a full renovation that replaces the kitchen, bathrooms, flooring, wiring and plumbing. It is best to obtain a site-based quotation instead of relying on one general price per square foot.
Build your budget around these categories
Assessment and demolition
Inspection, protection of retained areas, removal of old fittings, dismantling, transport and debris disposal.
Repairs and services
Structural repairs where required, plumbing, electrical upgrades, waterproofing and related testing.
Finishes and fixtures
Flooring, tiles, plaster repairs, paint, doors, windows, bathroom fittings and lighting.
Interior furniture
Kitchen cabinets, wardrobes, storage units, hardware, countertops and installation.
Keep a contingency reserve
Set aside a separate contingency for unexpected conditions discovered during demolition or repair. Older apartments may have concealed leaks, damaged substrates, outdated wiring or irregular surfaces that cannot be fully assessed during an initial visit.
The reserve should reflect the property’s condition and the uncertainty in the work scope. Keep it separate from the planned spending on finishes and decor.
How to Choose Materials for an Old Apartment
Flooring
Choose flooring based on the condition of the existing substrate, the required finish, maintenance needs and the height of adjoining rooms. Before installing new flooring over an existing surface, confirm that the substrate is suitable and that the additional floor height will not create problems at doors and thresholds.
Wall paint
Prepare the surface properly and address the source of dampness before painting. Select a finish appropriate to the wall condition and expected use. A new coat of paint should not be treated as a repair for continuing water ingress.
Kitchen cabinets and wardrobes
Compare the actual board or plywood specification, thickness, finish, edge treatment, hardware and installation details. Choose materials suited to the location, particularly around sinks and other moisture-prone areas.
Bathroom tiles and fittings
Consider slip resistance, cleaning requirements, drainage and compatibility with the selected waterproofing system. Confirm the location of taps, shower fittings and accessories before tiling begins.
Lighting and electrical accessories
Plan lighting and socket positions around the furniture layout and the household’s appliance needs. Use appropriate products and have electrical work completed and tested by a qualified electrician.
How Long Does It Take to Renovate an Old Apartment?
The duration depends on the scope, site condition, approval process, material availability, contractor scheduling and whether the apartment remains occupied during the work.
| Renovation Scope | Typical Planning Consideration | Possible Delays |
|---|---|---|
| Cosmetic refresh | Painting, minor repairs and selected fixture changes | Surface repairs, drying and material availability |
| Partial renovation | Selected rooms, storage upgrades or a kitchen refresh | Existing condition and coordination between trades |
| Major renovation | Multiple rooms, flooring, kitchen or bathroom replacement and service upgrades | Hidden defects, waterproofing, approvals and custom fabrication |
| Extensive refurbishment | Large-scale work involving several systems and extensive finishing | Structural assessments, complex service changes and procurement |
For initial planning, a minor refresh may take days to a few weeks, while a major apartment renovation can take several weeks to a few months. These are broad planning ranges rather than a commitment for a particular property.
Ask the contractor for a project schedule with milestones for demolition, concealed services, waterproofing, tiling, carpentry, painting and final installation. Include time for inspections, curing and delivery of custom items.
For more details, read our guide on how long a home interior project takes.
Should You Live in the Apartment During Renovation?
It may be possible to remain in the flat during limited work, but a major renovation can involve dust, noise, water interruptions, electrical shutdowns and rooms that cannot be used safely.
Staying in the flat may be manageable when
- Work is limited to one room or a defined area.
- Essential services remain safe and functional.
- The contractor can isolate the work area.
- Dust control, ventilation and daily cleanup are practical.
- There is a safe route to the entrance and necessary facilities.
Temporary accommodation may be preferable when
- Both bathrooms or the kitchen will be unusable.
- Major demolition or extensive rewiring is planned.
- Water or electrical services must be shut down for extended periods.
- Dust, noise or access conditions make the flat unsuitable.
- Safety risks cannot be adequately separated from occupied areas.
Discuss the sequence with the contractor before work begins. If the apartment remains occupied, agree on access, storage of belongings, daily cleanup and arrangements for essential facilities.
Common Old Apartment Renovation Mistakes to Avoid
- Starting without an inspection: Hidden defects can change the cost and work scope.
- Painting over dampness: Find and repair the source of water entry before applying new finishes.
- Ignoring electrical safety: Have the installation assessed and upgrade it where required.
- Skipping waterproofing checks: Ensure the specified system is installed and tested at the appropriate stage.
- Changing the layout late: Finalise furniture, plumbing and electrical positions before construction reaches the finishing stage.
- Comparing quotations with different scopes: Match specifications, quantities and inclusions before comparing prices.
- Choosing materials by appearance alone: Check suitability, maintenance, durability and installation requirements.
- Ordering custom furniture too late: Coordinate measurements, production and installation with the project schedule.
- Ignoring building rules: Confirm requirements for demolition, common areas, exterior elements and service changes.
- Paying the full amount before inspection: Agree on written milestones and reserve the agreed final payment until completion and snagging are addressed.
Old Apartment Renovation Checklist
Use this checklist before hiring a contractor and throughout the project.
- Inspect walls, ceilings, floors, windows and doors.
- Record visible dampness, cracks and signs of leakage.
- Arrange professional assessments for structural or electrical concerns.
- Check plumbing, drainage and bathroom waterproofing requirements.
- Define what will be repaired, retained, removed and replaced.
- Measure rooms and prepare a furniture and storage layout.
- Confirm building or society permissions before starting regulated work.
- Prepare a realistic budget with a contingency reserve.
- Obtain itemized quotations and written material specifications.
- Agree on work sequence, timeline and payment milestones.
- Complete concealed services and waterproofing before covering them.
- Inspect critical work before tiling, plastering or closing ceilings.
- Protect retained furniture, flooring and common areas.
- Test electrical points, plumbing, drainage, doors and hardware.
- Prepare a snag list and obtain warranty and product documents.
How to Select an Apartment Renovation Contractor
Choose a contractor based on the suitability of their experience, clarity of the quotation, quality of workmanship and ability to coordinate the required trades.
- Review relevant completed renovation projects and, where possible, speak to previous clients.
- Ask who will supervise the work and coordinate different trades.
- Confirm the materials, quantities, labour and exclusions in writing.
- Discuss how unexpected repairs and changes will be approved and priced.
- Agree on a realistic timeline and written payment milestones.
- Confirm how the contractor will protect the apartment and common areas.
- Clarify warranty terms, defects handling and final handover requirements.
Read our checklist before hiring an interior contractor and our guide on how to compare interior design quotations before making a decision.
Related Home Interior Guides
- Premium home interiors — explore ideas for coordinating your home’s finishes and furniture.
- How to maximise storage in a small flat — plan practical storage for compact apartments.
- Best colours for a small living room — choose colours for a refreshed living space.
- What is included in turnkey interior design? — understand the scope of coordinated interior work.
Frequently Asked Questions
1. How do I start renovating an old apartment?
Start with a room-by-room inspection, define the work scope and identify any structural, plumbing, electrical or waterproofing concerns. Prepare a budget and measured layout before selecting finishes or ordering custom furniture.
2. What should be renovated first in an old flat?
Address safety-critical problems and hidden defects first, including structural concerns, electrical faults, plumbing leaks and waterproofing issues. Complete concealed services before closing walls, laying tiles or installing finished cabinetry.
3. How much does it cost to renovate an old apartment in India?
The cost varies with apartment size, condition, location, materials and the scope of work. A cosmetic refresh costs substantially less than a renovation involving new bathrooms, kitchen cabinets, flooring, electrical wiring and plumbing. Obtain an itemized, site-based quotation before setting the final budget.
4. How long does an old apartment renovation take?
A minor refresh may take days to a few weeks, while a major renovation can take several weeks to a few months. The schedule depends on the work scope, hidden defects, approvals, material delivery and coordination between trades.
5. Should I replace the plumbing in an old apartment?
Not automatically. The decision should be based on the pipe material, visible condition, leakage history, corrosion and professional assessment. If the plumbing is being replaced, coordinate it with bathroom and kitchen work before surfaces are finished.
6. Is complete electrical rewiring necessary in an old flat?
It depends on the condition and suitability of the existing installation. Have a qualified electrician assess wiring, earthing, circuit protection and capacity for current appliances, and carry out any required upgrades safely.
7. Can I renovate an old apartment on a limited budget?
Yes. Prioritise essential repairs, retain sound components where appropriate and phase non-essential upgrades. Avoid cutting costs on safety, necessary waterproofing or proper installation, as failures can create more expensive repairs later.
8. Can I change the layout of an old apartment?
Some furniture and non-structural layout changes may be possible, but walls, beams, columns, shared services and external elements require careful assessment. Obtain professional advice and any necessary approvals before changing structural or regulated elements.
9. Can I live in the flat during renovation?
It may be possible during limited work if essential services and safe access remain available. Major demolition, extensive rewiring or work affecting the kitchen and bathrooms may make temporary accommodation more practical.
10. How can I avoid renovation cost overruns?
Define the scope, obtain itemized quotations, specify materials in writing, include a contingency reserve and approve changes before work proceeds. Inspect critical concealed work before it is covered and keep records of payments and variations.
11. What should I check before accepting the completed renovation?
Test lights, sockets, water supply, drainage, doors, windows, cabinet hardware and appliances. Inspect visible finishes, record outstanding defects and collect warranties, product information and relevant drawings.
12. Do I need permission from the apartment society?
Check the society or association rules before starting. Renovation hours, debris removal, lift protection, service shutdowns and changes to external or common elements may be regulated. Structural changes and work affecting shared services may need additional approvals.
Planning to Renovate Your Old Apartment?
Start with a clear assessment, a practical budget and a defined scope of work. The right sequence helps you address underlying problems before investing in new finishes, furniture and decor.